OpenSimWorld is the directory of 3D Virtual Worlds based on OpenSimulator and connected through the HyperGrid. Learn More

New Members
B0OSS, GAY_ASIA, LlJ0kerll, Slowyx, LyndaRobinson, Freija, ADULT_LIFE, Dakotha_Sunflower, ValeriaLux, Githubacc, ThomasBoa85, LolaSeq, RiverAlder, Mnvcycdg, Jolie25, Skimi, Aphra Hendrix again, Siche_skirun, Letic1a, AlvarLikes
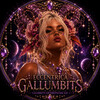
From Curiosity to Creation: My AI Avatar Workflow
Like many people, I was curious about what AI could actually do. Rather than debating it, I decided to run my own experiment.
My goal was simple: Could I create original OpenSimulator avatars using AI as part of the workflow?
The answer surprised me.
What began as a test quickly turned into a creative process that produced characters like the Mantis Scholar, the Intergalactic Traveler, and many of the residents now found at Gallumbits – The Last Restaurant at the End of the Universe.
I know AI has both supporters and critics, and everyone has their reasons. For me, AI isn't a replacement for creativity—it's another tool in the toolbox. Just as Blender, Avastar, and Tripo each have a specific purpose, AI helps me transform ideas into something I can continue to build with my own hands.
The important part is understanding that AI doesn't finish the job for you. It helps you begin.
Every avatar still requires planning, refinement, cleanup, rigging, testing, packaging, and countless creative decisions. The final result comes from combining imagination with traditional 3D tools and a willingness to learn.
This article shares the workflow I've developed so others can see what's involved and, if they're interested, create their own original characters for OpenSimulator. My hope is that it encourages more people to experiment, learn new skills, and discover that AI is most powerful when it's treated as a creative partner rather than a shortcut.
After all, every great journey begins with a single idea. Sometimes all it takes is the right collection of tools to bring that idea to life.
Creating an Original OpenSimulator Avatar
From Character Idea to In-World Avatar
This tutorial explains the workflow I use to create original characters for OpenSimulator. The process combines character development, AI-assisted concept art, 3D generation, mesh cleanup, rigging, testing, and packaging.
The finished avatar does not come directly from a game or an existing character library. It begins as an original idea and passes through several tools before it becomes usable in-world.
Tools You Will Need
ChatGPT
• Develop the character idea.
• Refine the appearance and personality.
• Generate a clean character reference image.
• Create front-facing T-pose artwork.
• Plan clothing, colors, and accessories.
• Write the avatar description and promotional material.
Tripo
Used to:
• Turn the character reference image into a 3D mesh.
• Generate the initial geometry and textures.
• Export the character as a GLB, FBX, or another Blender-compatible format.
Blender
Used to:
• Inspect and clean the generated mesh.
• Remove unwanted geometry.
• Correct body proportions.
• Separate or join mesh parts.
• Reduce excessive polygon counts.
• Repair materials and textures.
• Prepare the model for rigging and export.
Avastar
Used inside Blender to:
• Add the OpenSimulator-compatible avatar skeleton.
• Bind the model to the armature.
• Assign weights.
• correct deformation problems.
• Test poses and animations.
• Export the rigged avatar as Collada DAE.
You will also need access to an OpenSimulator grid and a viewer such as Firestorm to upload and test the finished avatar.
________________________________________
Step 1: Develop the Character Idea
Start with more than a general request such as “make an alien.”
Give the character a recognizable identity.
For example:
A friendly intergalactic traveler with turquoise skin, four amber eyes, a round head, short antennae, brass goggles, an explorer suit, gloves, trousers, and boots.
Consider:
• What species is the character?
• What is its occupation?
• Where does it come from?
• Is it friendly, mysterious, serious, or humorous?
• What makes its silhouette recognizable?
• Will the design be practical to rig?
A character with a role is usually more memorable than a generic creature.
Examples include:
• Mantis Scholar
• Intergalactic Traveler
________________________________________
Step 2: Design for Rigging Before Generating the Image
Some designs look beautiful in artwork but become difficult or impossible to rig.
Avoid:
• Hanging vines.
• Loose chains.
• Long necklaces.
• Flowing scarves.
• Long skirts.
• Dangling belts.
• Separate floating ornaments.
• Fabric hanging between the arms and body.
• Extremely thin fingers or limbs.
• Objects crossing through the body.
• Hair that extends far from the head.
These elements often become fused together when Tripo generates the model.
Prefer:
• Clothing fitted closely to the body.
• Boots that are part of the character.
• Short hair, sculpted hair, or no hair.
• Molded belts and badges.
• Compact armor panels.
• Clear separation between the arms and torso.
• A clean, symmetrical body.
• Accessories created separately.
A suitcase, staff, handbag, weapon, or instrument should normally be made as a separate object rather than included in the avatar reference image.
________________________________________
Step 3: Create the Character Reference Image
Ask ChatGPT to create a single clean reference image.
A useful prompt would be:
Create one full-body front view of an original intergalactic traveler. The character must stand in a true T-pose with both arms extended horizontally. He must face directly forward. Use a plain medium-gray background. Show the entire body from the top of the head to the bottom of the boots. The explorer clothing must fit closely to the body with no hanging straps, loose cloth, chains, bags, or props. Use symmetrical lighting and a clean 3D character-render style.
Important requirements:
• One character only.
• One view only.
• Full body visible.
• Directly facing forward.
• True T-pose.
• Neutral gray background.
• Feet separated slightly.
• Fingers visible if possible.
• No suitcase or props.
• No dramatic perspective.
• No text.
• No environmental background.
• No body parts cropped from the image.
Do not use a promotional advertisement as the Tripo reference. Use a simple character sheet image.
________________________________________
Step 4: Inspect the Image Before Using Tripo
Before uploading the image to Tripo, check it carefully.
Confirm that:
• Both arms are approximately level.
• The hands do not touch the body.
• The clothing does not bridge the arms and torso.
• The legs are clearly separated.
• The boots are visible.
• The character is symmetrical.
• Nothing is hanging from the clothing.
• The character is not holding anything.
• The front of the body is clearly visible.
• The background is plain.
Fix the reference image before generating the model. It is usually easier to correct the design at this stage than to repair a badly fused mesh later.
________________________________________
Step 5: Generate the Model in Tripo
Upload the clean T-pose reference image to Tripo.
Choose the image-to-3D generation option.
When possible:
• Use the highest-quality generation mode.
• Keep the original proportions.
• Avoid automatic animation at this stage.
• Generate the character without a background.
• Export the textured model.
Download the model in a format Blender can read, such as:
• GLB
• FBX
• OBJ
GLB is often convenient because it can contain the mesh, materials, and texture references together.
Tripo gives you a starting model. It is not normally ready to upload directly into OpenSimulator.
________________________________________
Step 6: Import the Character into Blender
In Blender:
1. Open a new project.
2. Delete the default cube if necessary.
3. Choose File → Import.
4. Select the format exported from Tripo.
5. Import the character.
6. Save the Blender file immediately under a new project name.
Inspect the character from:
• Front.
• Back.
• Left side.
• Right side.
• Top.
• Bottom.
Look for:
• Holes in the mesh.
• Fused fingers.
• Clothing attached to the arms.
• Extra geometry.
• Duplicated surfaces.
• Uneven legs.
• Distorted boots.
• Missing back details.
• Strange geometry under the arms.
• Internal geometry that is not needed.
Do not assume the model is correct simply because the front view looks good.
________________________________________
Step 7: Clean the Mesh
Enter Edit Mode and remove obvious unwanted geometry.
Common cleanup work includes:
• Deleting background remnants.
• Removing floating fragments.
• Merging duplicate vertices.
• Correcting normals.
• Closing holes.
• Smoothing rough areas.
• Separating objects that should not be fused.
• Joining pieces that should move together.
• Removing hidden geometry inside the character.
Useful Blender operations include:
• Merge by Distance.
• Recalculate Normals Outside.
• Limited Dissolve.
• Decimate Modifier.
• Smooth by Angle.
• Separate by Selection.
• Join Objects.
Be cautious with heavy decimation. Reducing the polygon count too aggressively can damage:
• The face.
• Hands.
• Boots.
• Eyes.
• Clothing seams.
• Antennae.
Always keep a copy of the original imported mesh before making destructive changes.
________________________________________
Step 8: Prepare the Character for Avastar
Before rigging:
• Apply rotation.
• Apply scale.
• Apply location if appropriate.
• Make certain the character faces the correct forward direction.
• Position the feet near the Blender floor.
• Center the character on the world origin.
• Confirm that the body is symmetrical.
• Check that the arms remain in a usable T-pose.
Use:
Object → Apply → Rotation and Scale
The character should be close to the proportions of the Avastar reference avatar. It does not need to be human, but the major joints must line up reasonably well.
Check the placement of:
• Head.
• Neck.
• Shoulders.
• Elbows.
• Wrists.
• Pelvis.
• Knees.
• Ankles.
________________________________________
Step 9: Add the Avastar Rig
Create an Avastar character rig inside Blender.
Choose the skeleton suitable for OpenSimulator or Second Life compatibility.
Position and scale the armature so that the bones align with the generated character.
Pay special attention to:
• Shoulder placement.
• Elbow position.
• Hand bones.
• Hip joints.
• Knee joints.
• Foot bones.
• Neck and head bones.
Do not force the mesh into an unnatural shape merely to fit the default skeleton. Adjust the skeleton carefully while preserving valid bone relationships.
________________________________________
Step 10: Bind the Mesh
Select the mesh and the Avastar armature in the correct order.
Bind using either:
• Automatic weights.
• Empty groups followed by manual assignment.
• Avastar’s binding tools.
Automatic weights may provide a starting point, but generated characters often require manual correction.
After binding, move the major bones to test:
• Arms.
• Elbows.
• Shoulders.
• Head.
• Hips.
• Knees.
• Feet.
Typical problems include:
• Arms collapsing into the torso.
• Shoulders pulling the chest.
• Boots bending incorrectly.
• The abdomen stretching.
• Fingers deforming.
• Eyes moving with the wrong bones.
• Clothing cutting into the body.
________________________________________
Step 11: Correct the Weights
Use Weight Paint Mode to correct deformation.
The most important areas are usually:
• Shoulders.
• Armpits.
• Elbows.
• Wrists.
• Pelvis.
• Thighs.
• Knees.
• Ankles.
• Neck.
For clothing that is already part of the body mesh, weight the clothing with the body section underneath it.
The explorer suit should not be treated as a separate wearable clothing item when it was generated as part of the character. It is part of the avatar mesh and moves with the same skeleton.
Test several poses, not only the T-pose.
Useful tests include:
• Arms down at the sides.
• Arms raised.
• Walking pose.
• Sitting pose.
• Bent knees.
• Head turned.
• Elbows bent.
• Hands near the hips.
The avatar must work in motion, not merely look correct while standing still.
________________________________________
Step 12: Handle Eyes, Antennae, and Special Features
Unusual characters often require extra attention.
Eyes
For a character with four eyes, the simplest option may be to weight all eyes to the head bone. More advanced eye movement can be added later.
Antennae
Short, rigid antennae can usually be weighted to the head bone.
Long or flexible antennae may require additional bones or separate rigging. For a simple free avatar, keeping them rigid is often more reliable.
Goggles
Goggles and their strap should be part of the head mesh or weighted to the head bone.
Remember to inspect the back of the head. The strap must continue around the back if that is part of the design.
Boots
Boots generated as part of the outfit should remain attached to the leg mesh and be weighted carefully to the lower leg and foot bones.
I found that rigging with everything attached or painted on is much simpler than rigging four eyes, painted on eyes work fine for RP.
________________________________________
Step 13: Work With Materials and Textures
Tripo may generate one or more texture maps.
These may include:
• Base color.
• Normal map.
• Roughness.
• Metallic.
• Ambient occlusion.
OpenSimulator support varies depending on the viewer and grid configuration.
For basic compatibility, begin with the base color texture.
Reduce oversized textures where appropriate. A 4096 × 4096 texture may be unnecessarily large for an avatar intended for general distribution.
Possible practical sizes include:
• 1024 × 1024 for a detailed body texture.
• 512 × 512 for smaller surfaces.
• 256 × 256 for very small accessories.
Do not claim that texture files are included unless you actually package and distribute them.
If only the mesh is being provided, state that clearly.
________________________________________
Step 14: Export the Rigged Avatar
Before exporting:
• Return the skeleton to the required rest pose.
• Check that the correct meshes are selected.
• Confirm that the armature is included.
• Remove unused objects.
• Confirm that the scale is correct.
• Verify bone assignments.
• Check Avastar’s export warnings.
Export the avatar as a Collada DAE file using Avastar’s export tools.
Use OpenSimulator-compatible settings.
Save:
• The Blender project.
• The exported DAE.
• The textures.
• A copy of the original Tripo model.
• The character reference artwork.
Keep each character in its own project folder.
________________________________________
Step 15: Upload to OpenSimulator
In Firestorm or another compatible viewer:
1. Open the mesh uploader.
2. Select the DAE file.
3. Review all LOD levels.
4. Check the physics shape.
5. Confirm the skin weights.
6. Confirm joint positions if used.
7. Upload the model.
8. Rez it in-world.
9. Apply the texture.
10. Wear or attach the avatar according to your grid’s workflow.
Test the avatar using several animations.
Check:
• Arms hanging naturally.
• Walking.
• Sitting.
• Turning.
• Dancing.
• Kneeling.
• Flying.
• Standing idle.
A model that looks correct in Blender can still reveal weighting problems in-world.
Most models the arms hang close to the sides this is something I have been trying to perfect. All are rigged in T pose or A pose
________________________________________
Step 16: Create Props Separately
Props such as the traveler’s suitcase should be generated or modeled separately.
This allows the suitcase to be:
• Held in one hand.
• Attached to a hand or forearm.
• Rezzed on the floor.
• Used with other avatars.
The suitcase can contain a rolled towel as a separate visible object.
Keep the prop simple:
• Clean handle.
• No attachment to the avatar body.
• No cloth hanging from it.
• No loose straps unless they are modeled rigidly.
• Reasonable polygon count.
• Clear attachment orientation.
________________________________________
Step 17: Package the Avatar
Create an in-world box containing the items you actually intend to distribute.
The package might include:
• Rigged avatar mesh.
• Required base texture, if included.
• Shape or wearable setup instructions.
• A notecard explaining permissions and use.
________________________________________
Final Workflow Summary
The complete workflow is:
Idea → ChatGPT character design → clean T-pose image → Tripo 3D generation → Blender cleanup → Avastar rigging → weight correction → texture preparation → DAE export → OpenSimulator upload → in-world testing → prop creation → packaging → promotional artwork
The important point is that no single tool creates the finished OpenSimulator avatar.
ChatGPT helps develop and visualize the original idea. Tripo creates the first 3D interpretation. Blender and Avastar turn that raw model into a functional rigged avatar. OpenSimulator testing determines whether the character actually works.
That is the creative and technical process behind each Gallumbits character.
I hope that you can take this information and create your own unique avatars.
My goal was simple: Could I create original OpenSimulator avatars using AI as part of the workflow?
The answer surprised me.
What began as a test quickly turned into a creative process that produced characters like the Mantis Scholar, the Intergalactic Traveler, and many of the residents now found at Gallumbits – The Last Restaurant at the End of the Universe.
I know AI has both supporters and critics, and everyone has their reasons. For me, AI isn't a replacement for creativity—it's another tool in the toolbox. Just as Blender, Avastar, and Tripo each have a specific purpose, AI helps me transform ideas into something I can continue to build with my own hands.
The important part is understanding that AI doesn't finish the job for you. It helps you begin.
Every avatar still requires planning, refinement, cleanup, rigging, testing, packaging, and countless creative decisions. The final result comes from combining imagination with traditional 3D tools and a willingness to learn.
This article shares the workflow I've developed so others can see what's involved and, if they're interested, create their own original characters for OpenSimulator. My hope is that it encourages more people to experiment, learn new skills, and discover that AI is most powerful when it's treated as a creative partner rather than a shortcut.
After all, every great journey begins with a single idea. Sometimes all it takes is the right collection of tools to bring that idea to life.
Creating an Original OpenSimulator Avatar
From Character Idea to In-World Avatar
This tutorial explains the workflow I use to create original characters for OpenSimulator. The process combines character development, AI-assisted concept art, 3D generation, mesh cleanup, rigging, testing, and packaging.
The finished avatar does not come directly from a game or an existing character library. It begins as an original idea and passes through several tools before it becomes usable in-world.
Tools You Will Need
ChatGPT
• Develop the character idea.
• Refine the appearance and personality.
• Generate a clean character reference image.
• Create front-facing T-pose artwork.
• Plan clothing, colors, and accessories.
• Write the avatar description and promotional material.
Tripo
Used to:
• Turn the character reference image into a 3D mesh.
• Generate the initial geometry and textures.
• Export the character as a GLB, FBX, or another Blender-compatible format.
Blender
Used to:
• Inspect and clean the generated mesh.
• Remove unwanted geometry.
• Correct body proportions.
• Separate or join mesh parts.
• Reduce excessive polygon counts.
• Repair materials and textures.
• Prepare the model for rigging and export.
Avastar
Used inside Blender to:
• Add the OpenSimulator-compatible avatar skeleton.
• Bind the model to the armature.
• Assign weights.
• correct deformation problems.
• Test poses and animations.
• Export the rigged avatar as Collada DAE.
You will also need access to an OpenSimulator grid and a viewer such as Firestorm to upload and test the finished avatar.
________________________________________
Step 1: Develop the Character Idea
Start with more than a general request such as “make an alien.”
Give the character a recognizable identity.
For example:
A friendly intergalactic traveler with turquoise skin, four amber eyes, a round head, short antennae, brass goggles, an explorer suit, gloves, trousers, and boots.
Consider:
• What species is the character?
• What is its occupation?
• Where does it come from?
• Is it friendly, mysterious, serious, or humorous?
• What makes its silhouette recognizable?
• Will the design be practical to rig?
A character with a role is usually more memorable than a generic creature.
Examples include:
• Mantis Scholar
• Intergalactic Traveler
________________________________________
Step 2: Design for Rigging Before Generating the Image
Some designs look beautiful in artwork but become difficult or impossible to rig.
Avoid:
• Hanging vines.
• Loose chains.
• Long necklaces.
• Flowing scarves.
• Long skirts.
• Dangling belts.
• Separate floating ornaments.
• Fabric hanging between the arms and body.
• Extremely thin fingers or limbs.
• Objects crossing through the body.
• Hair that extends far from the head.
These elements often become fused together when Tripo generates the model.
Prefer:
• Clothing fitted closely to the body.
• Boots that are part of the character.
• Short hair, sculpted hair, or no hair.
• Molded belts and badges.
• Compact armor panels.
• Clear separation between the arms and torso.
• A clean, symmetrical body.
• Accessories created separately.
A suitcase, staff, handbag, weapon, or instrument should normally be made as a separate object rather than included in the avatar reference image.
________________________________________
Step 3: Create the Character Reference Image
Ask ChatGPT to create a single clean reference image.
A useful prompt would be:
Create one full-body front view of an original intergalactic traveler. The character must stand in a true T-pose with both arms extended horizontally. He must face directly forward. Use a plain medium-gray background. Show the entire body from the top of the head to the bottom of the boots. The explorer clothing must fit closely to the body with no hanging straps, loose cloth, chains, bags, or props. Use symmetrical lighting and a clean 3D character-render style.
Important requirements:
• One character only.
• One view only.
• Full body visible.
• Directly facing forward.
• True T-pose.
• Neutral gray background.
• Feet separated slightly.
• Fingers visible if possible.
• No suitcase or props.
• No dramatic perspective.
• No text.
• No environmental background.
• No body parts cropped from the image.
Do not use a promotional advertisement as the Tripo reference. Use a simple character sheet image.
________________________________________
Step 4: Inspect the Image Before Using Tripo
Before uploading the image to Tripo, check it carefully.
Confirm that:
• Both arms are approximately level.
• The hands do not touch the body.
• The clothing does not bridge the arms and torso.
• The legs are clearly separated.
• The boots are visible.
• The character is symmetrical.
• Nothing is hanging from the clothing.
• The character is not holding anything.
• The front of the body is clearly visible.
• The background is plain.
Fix the reference image before generating the model. It is usually easier to correct the design at this stage than to repair a badly fused mesh later.
________________________________________
Step 5: Generate the Model in Tripo
Upload the clean T-pose reference image to Tripo.
Choose the image-to-3D generation option.
When possible:
• Use the highest-quality generation mode.
• Keep the original proportions.
• Avoid automatic animation at this stage.
• Generate the character without a background.
• Export the textured model.
Download the model in a format Blender can read, such as:
• GLB
• FBX
• OBJ
GLB is often convenient because it can contain the mesh, materials, and texture references together.
Tripo gives you a starting model. It is not normally ready to upload directly into OpenSimulator.
________________________________________
Step 6: Import the Character into Blender
In Blender:
1. Open a new project.
2. Delete the default cube if necessary.
3. Choose File → Import.
4. Select the format exported from Tripo.
5. Import the character.
6. Save the Blender file immediately under a new project name.
Inspect the character from:
• Front.
• Back.
• Left side.
• Right side.
• Top.
• Bottom.
Look for:
• Holes in the mesh.
• Fused fingers.
• Clothing attached to the arms.
• Extra geometry.
• Duplicated surfaces.
• Uneven legs.
• Distorted boots.
• Missing back details.
• Strange geometry under the arms.
• Internal geometry that is not needed.
Do not assume the model is correct simply because the front view looks good.
________________________________________
Step 7: Clean the Mesh
Enter Edit Mode and remove obvious unwanted geometry.
Common cleanup work includes:
• Deleting background remnants.
• Removing floating fragments.
• Merging duplicate vertices.
• Correcting normals.
• Closing holes.
• Smoothing rough areas.
• Separating objects that should not be fused.
• Joining pieces that should move together.
• Removing hidden geometry inside the character.
Useful Blender operations include:
• Merge by Distance.
• Recalculate Normals Outside.
• Limited Dissolve.
• Decimate Modifier.
• Smooth by Angle.
• Separate by Selection.
• Join Objects.
Be cautious with heavy decimation. Reducing the polygon count too aggressively can damage:
• The face.
• Hands.
• Boots.
• Eyes.
• Clothing seams.
• Antennae.
Always keep a copy of the original imported mesh before making destructive changes.
________________________________________
Step 8: Prepare the Character for Avastar
Before rigging:
• Apply rotation.
• Apply scale.
• Apply location if appropriate.
• Make certain the character faces the correct forward direction.
• Position the feet near the Blender floor.
• Center the character on the world origin.
• Confirm that the body is symmetrical.
• Check that the arms remain in a usable T-pose.
Use:
Object → Apply → Rotation and Scale
The character should be close to the proportions of the Avastar reference avatar. It does not need to be human, but the major joints must line up reasonably well.
Check the placement of:
• Head.
• Neck.
• Shoulders.
• Elbows.
• Wrists.
• Pelvis.
• Knees.
• Ankles.
________________________________________
Step 9: Add the Avastar Rig
Create an Avastar character rig inside Blender.
Choose the skeleton suitable for OpenSimulator or Second Life compatibility.
Position and scale the armature so that the bones align with the generated character.
Pay special attention to:
• Shoulder placement.
• Elbow position.
• Hand bones.
• Hip joints.
• Knee joints.
• Foot bones.
• Neck and head bones.
Do not force the mesh into an unnatural shape merely to fit the default skeleton. Adjust the skeleton carefully while preserving valid bone relationships.
________________________________________
Step 10: Bind the Mesh
Select the mesh and the Avastar armature in the correct order.
Bind using either:
• Automatic weights.
• Empty groups followed by manual assignment.
• Avastar’s binding tools.
Automatic weights may provide a starting point, but generated characters often require manual correction.
After binding, move the major bones to test:
• Arms.
• Elbows.
• Shoulders.
• Head.
• Hips.
• Knees.
• Feet.
Typical problems include:
• Arms collapsing into the torso.
• Shoulders pulling the chest.
• Boots bending incorrectly.
• The abdomen stretching.
• Fingers deforming.
• Eyes moving with the wrong bones.
• Clothing cutting into the body.
________________________________________
Step 11: Correct the Weights
Use Weight Paint Mode to correct deformation.
The most important areas are usually:
• Shoulders.
• Armpits.
• Elbows.
• Wrists.
• Pelvis.
• Thighs.
• Knees.
• Ankles.
• Neck.
For clothing that is already part of the body mesh, weight the clothing with the body section underneath it.
The explorer suit should not be treated as a separate wearable clothing item when it was generated as part of the character. It is part of the avatar mesh and moves with the same skeleton.
Test several poses, not only the T-pose.
Useful tests include:
• Arms down at the sides.
• Arms raised.
• Walking pose.
• Sitting pose.
• Bent knees.
• Head turned.
• Elbows bent.
• Hands near the hips.
The avatar must work in motion, not merely look correct while standing still.
________________________________________
Step 12: Handle Eyes, Antennae, and Special Features
Unusual characters often require extra attention.
Eyes
For a character with four eyes, the simplest option may be to weight all eyes to the head bone. More advanced eye movement can be added later.
Antennae
Short, rigid antennae can usually be weighted to the head bone.
Long or flexible antennae may require additional bones or separate rigging. For a simple free avatar, keeping them rigid is often more reliable.
Goggles
Goggles and their strap should be part of the head mesh or weighted to the head bone.
Remember to inspect the back of the head. The strap must continue around the back if that is part of the design.
Boots
Boots generated as part of the outfit should remain attached to the leg mesh and be weighted carefully to the lower leg and foot bones.
I found that rigging with everything attached or painted on is much simpler than rigging four eyes, painted on eyes work fine for RP.
________________________________________
Step 13: Work With Materials and Textures
Tripo may generate one or more texture maps.
These may include:
• Base color.
• Normal map.
• Roughness.
• Metallic.
• Ambient occlusion.
OpenSimulator support varies depending on the viewer and grid configuration.
For basic compatibility, begin with the base color texture.
Reduce oversized textures where appropriate. A 4096 × 4096 texture may be unnecessarily large for an avatar intended for general distribution.
Possible practical sizes include:
• 1024 × 1024 for a detailed body texture.
• 512 × 512 for smaller surfaces.
• 256 × 256 for very small accessories.
Do not claim that texture files are included unless you actually package and distribute them.
If only the mesh is being provided, state that clearly.
________________________________________
Step 14: Export the Rigged Avatar
Before exporting:
• Return the skeleton to the required rest pose.
• Check that the correct meshes are selected.
• Confirm that the armature is included.
• Remove unused objects.
• Confirm that the scale is correct.
• Verify bone assignments.
• Check Avastar’s export warnings.
Export the avatar as a Collada DAE file using Avastar’s export tools.
Use OpenSimulator-compatible settings.
Save:
• The Blender project.
• The exported DAE.
• The textures.
• A copy of the original Tripo model.
• The character reference artwork.
Keep each character in its own project folder.
________________________________________
Step 15: Upload to OpenSimulator
In Firestorm or another compatible viewer:
1. Open the mesh uploader.
2. Select the DAE file.
3. Review all LOD levels.
4. Check the physics shape.
5. Confirm the skin weights.
6. Confirm joint positions if used.
7. Upload the model.
8. Rez it in-world.
9. Apply the texture.
10. Wear or attach the avatar according to your grid’s workflow.
Test the avatar using several animations.
Check:
• Arms hanging naturally.
• Walking.
• Sitting.
• Turning.
• Dancing.
• Kneeling.
• Flying.
• Standing idle.
A model that looks correct in Blender can still reveal weighting problems in-world.
Most models the arms hang close to the sides this is something I have been trying to perfect. All are rigged in T pose or A pose
________________________________________
Step 16: Create Props Separately
Props such as the traveler’s suitcase should be generated or modeled separately.
This allows the suitcase to be:
• Held in one hand.
• Attached to a hand or forearm.
• Rezzed on the floor.
• Used with other avatars.
The suitcase can contain a rolled towel as a separate visible object.
Keep the prop simple:
• Clean handle.
• No attachment to the avatar body.
• No cloth hanging from it.
• No loose straps unless they are modeled rigidly.
• Reasonable polygon count.
• Clear attachment orientation.
________________________________________
Step 17: Package the Avatar
Create an in-world box containing the items you actually intend to distribute.
The package might include:
• Rigged avatar mesh.
• Required base texture, if included.
• Shape or wearable setup instructions.
• A notecard explaining permissions and use.
________________________________________
Final Workflow Summary
The complete workflow is:
Idea → ChatGPT character design → clean T-pose image → Tripo 3D generation → Blender cleanup → Avastar rigging → weight correction → texture preparation → DAE export → OpenSimulator upload → in-world testing → prop creation → packaging → promotional artwork
The important point is that no single tool creates the finished OpenSimulator avatar.
ChatGPT helps develop and visualize the original idea. Tripo creates the first 3D interpretation. Blender and Avastar turn that raw model into a functional rigged avatar. OpenSimulator testing determines whether the character actually works.
That is the creative and technical process behind each Gallumbits character.
I hope that you can take this information and create your own unique avatars.
Liked by: 
Comments
No comments yet